Dual Master Cylinder Conversion on 1964 Thunderbird
done by: John Knight
Fellow Birders,
I finally stoped planning the duel master cylinder project and just
when out and did it. My Brittany Blue 64 HT had a bad day about a month
ago. I was away on the mainland and my daughter was driving the 64. The
stock single master cylinder developed a fluid leak into the booster and
left her with NO brakes. She went down a steep hill and straight through
two busy intersection before she could get to a small hill where she was
able to stop the car! No one was hurt and the car was fine but my daughter
refused to ride in the car anymore. That was the last straw. I went out
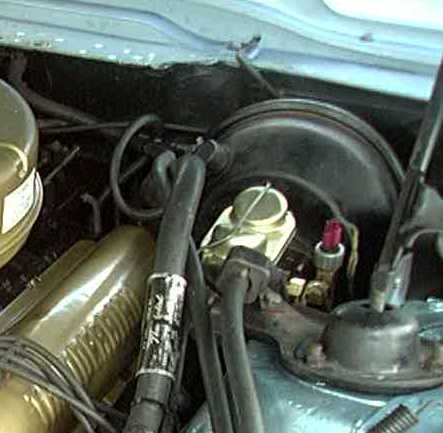
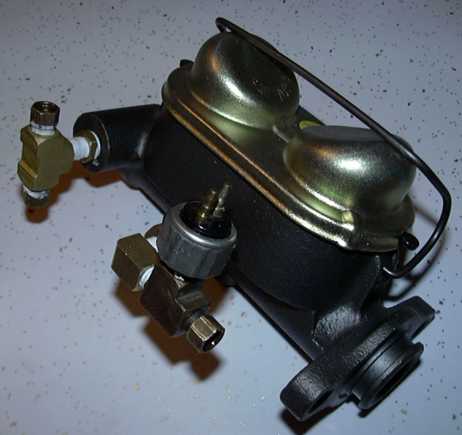
and got a 73 Mustang Drum/Drum master cylinder and proceeded to start the
project. The MC cleared the shock tower but I had to go to the auto parts
store and get some brass fittings to hook up the brake lines and the brake
sending unit. It took a total of nine brass fittings to make the
conversion. I was able to use four of the fittings off of the original MC.
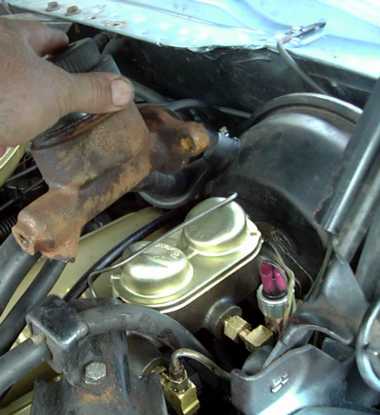
One of the issues on a 64 is that the brake sending unit is mounted on the
stock MC. The 73 Mustang MC has no provisions to mount the sending unit. I
solved this problem by adding a "T" brass fitting to the rear brake line.
All the brake lines were able to fit with a little adjustment. One thing I
noted was to forget the white teflon (sp?) tape. Use permatex thread lock on
all the brass fittings except where the break line attaches to the fittings
on the MC. The thread lock will prevent air from being sucked into the
system. (I learned the hard way. I blead more then 64 oz of fluid through
the system before I finally pulled the unit back out and took off the teflon
tape and added the thread lock.) The last thing I need to do is go the the
junk yard and find the driver's side shock tower cowl support strut from a
65 or 66 bird. This is necessary because the new MC won't clear the strut.
In 65 Ford redesigned the strut and shock tower mounting plate on the
driver's side to allow for a little more room to clear the MC. I have photos
of the MC with all the fittings attached before installation and photos of
the new MC installed in my car. Feel free to e-mail me for the photos.
Thanks
John Knight